과거 SLRclub에서 자유게시판 뿐만 아니라 각종 강좌와 사용기들도 섭렵하고 있던 시절에는 사진에 대한 열정이 정말 대단했습니다. 아무래도 그 당시에는 SLR에 갓 입문하는 사람이 아직 꽤 많았던 시기라서 스스로의 실력을 수행하는 분위기가 널리 퍼져있었던 것도 같습니다. 물론 이제는 사는 게 바쁘다보니 매너리즘에 빠져서 그냥저냥 찍는 인간이 되어버렸지만 당시에는 이런저런 시도들에 대해서 나름 연구를 많이 하고 또 타인의 강좌를 보고 많이 배우기도 했습니다.
그 중에 하나가 ND 느낌의 사진입니다.
Free Board, as well as in the past SLRclub sayonggi also mastered the various courses and the photographs were becoming so great a passion for it. Maybe that time is freshly SLR still pretty new to many people's ability to carry out their own time because the atmosphere was nothing like widespread. Now of course you live in a busy fall into mannerism geunyangjeonyang turned into a human, but take the time to try this and that is that a lot of research on its own and also learn a lot of other people also have reported the course.
One of them is a picture of the ND feel.

여기서 말하는 ND라는 것은 콘탁스에서 만든 DSLR 방식 카메라인 Ndigital을 말합니다.
매우 오래된 기종이지만, 그 특유의 물빠진 색감이 사람들을 매혹시키는 지라 단종된 이후로도 많은 유저들의 호응을 받았죠.
그런데 이 카메라는 매우 비싸고 또 희귀했습니다. 그래서 사람들은 포토샵 같은 후보정 작업을 통해서 ND의 색감을 구현할 수 있지 않을까 하고 그 방법을 탐구하게 되는데요. 제가 소개해 드릴 것은 NDStyler라는 프로그램과 Saturation mask라는 포토샵 액션입니다.
ND that is created in this context, Contax DSLR camera, the way you say Ndigital.
Very old model, but its unique colors attracts people who fell into the water discontinued yihurodo him I've taken a lot of users' response.
This camera is also rare, but it is very expensive. So people retouching work like Photoshop's color can be implemented through the ND and the way to explore outrageously lt works. I refer you and Saturation mask is a program called Photoshop NDStyler action.
자 우선 NDStyler입니다.
Now that first NDStyler.

당시 SLRclub의 어느 능력자께서 발명을 하셨는데 기억이 안 나네요.
이 프로그램은 포토샵 운용능력이 뛰어나지 못해도 ND의 색감을 구현할 수 있또록 매우 단순하고 쉽게 만들어져 있습니다.
때문에 오른쪽에 있는 Color / Gray / Reddish Film / Blueish Film 등의 옵션만 가지고 사진을 수정할 수 있도록 만들었습니다.
다만 그만큼 사용자의 취향에 맞는 사진을 세밀하게 조정하여 뽑아내기에는 한계가 있으며, 사진을 확인할 수 있는 창고 고정되어 있으므로 화면만 보고서는 결과물의 세밀한 확인이 어렵다는 단점을 가진다 하겠습니다.
One psychic said at the time of the invention of the films. I do not remember who invent this.
This program is Photoshop's color management capabilities to the poor can be implemented without having ND ttorok made very simple and easy.
Because the right of the Color / Gray / Reddish Film / Blueish Film only such options have made it so that you can modify the pictures.
Just so your tastes to fine-tune the picture there is a limit to pull up, and you can see pictures of the warehouse, but the report is fixed, so the screen is difficult to verify the result of the disadvantages will be fine.
 NDStyler3.exe
다음은 Saturation mask (Photoshop Action) 입니다.The following is a Saturation mask (Photoshop Action) is.

이렇게 포토샵에서 사용을 하는 것이고요.
우선 이렇게 사진 하나를 열어두고 시작을 해보겠습니다.
To do this, it is still used in Photoshop.
Thus leaving open one of the first pictures I'll start to try.

해당 액션 파일(ATN 확장자)을 마우스로 드래그하여 포토샵창에 가져다 넣으면 쉽게 추가가 됩니다.
만일 ACTION 창이 보이지 않는다면 Photoshop Menu-Window-Action을 활성화하세요.
Action 창에서 Make Saturation Mask를 선택하고 하단의 Play(삼각형) 버튼을 누릅니다.
The action file (ATN extension) with a mouse click and drag the window to bring Photoshop will put more easily.
ACTION If you do not see the ten thousand and one window to activate Photoshop Menu-Window-Action page.
Make Saturation Mask Action window, select the bottom of the Play (triangle) button.

그럼 아래 Layer 창에 Saturation mask가 형성되었을 겁니다.
여기서 위 그림과 같이 Curves 1 레이어에 있는 반으로 쪼개진 동그라미를 더블클릭하세요.
Saturation mask is then formed under the Layer window would have been.
Curves 1, as shown above, where a half layer, double-click on the split ring.

그럼 위쪽으로 Curve 창이 생깁니다.
이때 그 커브를 위 그림처럼 S자로 만들어 주세요.
이때 사진이 변하는 게 보일 것입니다.
자신이 원하는 정도로 세밀하게 조정해주세요.
Curve the top of the window then occur.
The characters that make S curve as shown above it.
The photo you will see a change.
So they want to fine-tune in.

조정이 끝났다면 Ctrl+Shift+E를 눌러 레이어를 병합해주세요.
물론 마지막에 저장은 해야겠죠?
Adjustment is finished, press Ctrl + Shift + E surface layer to merge back.
Of course, you need to save the last, right?
 Saturation_mask.atn
결과물 비교
Compare results

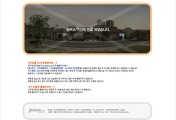
원본입니다
Original

NDStyler (컬러/그레이 옵션 이빠이)

Saturation Mask
제법 차이가 극명한데요. 아무래도 제가 NDStyler를 잘못 설정한 것일지도 모르겠습니다.
일단 샘플 사진만 봐서는 포토샵을 사용한 Saturation Mask가 원색은 원색대로 표현을 해주면서 채도가 낮은 부분의 색을 빼주는 대조효과에 더 충실해 보이는데요. 뭐 원리는 같을 것이기 때문에 NDStyler를 써서도 같은 결과물이 가능할 것 같기는 합니다.
하지만 NDStyler는 작업성이 좋지 않기 때문에, 조금이라도 포토샵을 다룰 줄 안다면 Saturation Mask를 사용하는 것이 작업성에 더 좋을 것입니다.
도움이 되길 바랍니다.
'm Pretty stark difference. Maybe I would be a wrong setting NDStyler I do not know.
Only one sample image with the looks Saturation Mask in Photoshop as the primary representation of the color saturation haejumyeonseo subtracting the lower portion of the color contrast effect looks more enriched. Because the principle is the same as what you wrote NDStyler also seems to be possible as a result of the two.
NDStyler but because of poor workability, If you know how to deal with a little Saturation Mask in Photoshop to use it would be better workability.
I hope that helps.
'사진' 카테고리의 다른 글
| 친구의 초상 (0) | 2013.12.11 |
|---|---|
| 실연 후에 (0) | 2013.12.11 |
| [사진일괄수정유틸]포토웍스(Photoworks) 1.5 (0) | 2013.12.08 |
| 석고보드 벽에 사진벽 만들기 - Photo wall DIY on Gypsum board (0) | 2013.12.05 |
| [셀프웨딩] 야외촬영 사진과 나름의 노하우 [Self Wedding Photo] (0) | 2013.09.23 |


댓글